Razer Chroma Addressable RGB Controller Review
While the $39.99 USD price point is consistent across retailers, the question as to whether this controller is a worthwhile addition to systems with complex lightning needs will be answered by more than a reasonable price point. Diving into the build quality, capabilities, ease of installation, and functionality of the Razer Chroma Addressable RGB controller will determine if this may be a viable option for your lighting needs.
Unpacking and Content Analysis
The controller arrives in a compact, brown cardboard box with large adhesive seals on the top and bottom flap. Opening this up provides the following contents:
- The Razer Chroma Addressable RGB Controller.
- Unit was wrapped in a protective grey plastic.
- Controller provides (6) ARGB headers.
- 3 ARGB headers per side.
- Each port is numerically labeled and corresponds to labels presented in the Synapse 3 software suite.
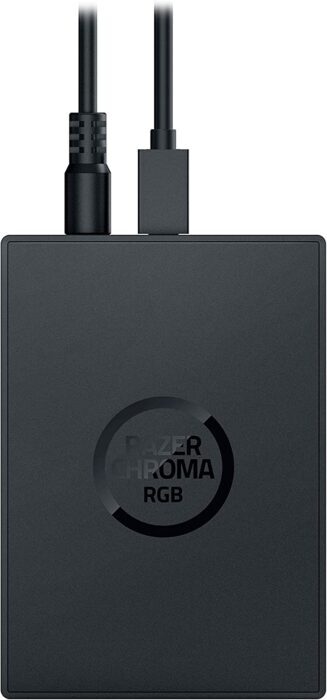
- Power cable
- Barrel connection for the end that connects into the controller.
- Molex power connection for the end that connects to the power supply.
- Data cable
- Micro-USB connection for the end that connects into the controller.
- Motherboard USB 2.0 header for the end that connects to the motherboard.
- Black Razer logo sticker
- Instruction Manual
- 3M Adhesive Stickers (for mounting)
The front and sides of the controller consist of a matte finished plastic that feels very firm in the hand. The openings on each side for the three ARGB headers appear to be sized appropriately for traditional case or fan connections. The back side has a thin layer of rubber that protects the majority of the controller’s backside. There are four screw holes present for mounting the controller in a location that may be traditionally occupied by a 2.5” drive within the case. For cases with one or two 3.5” drive trays, this would allow the controller to be hidden under a power supply shroud or in another non-visible location on the back of the case without using the adhesive pads.
Installation Experience
Installing the controller within a Corsair 4000D Airflow case didn’t provide any extended challenges. The two 2.5” drive caddies that mount to the back side of the case were relocated to the positions on top of the power supply shroud in this build. This provided ample room to place the controller out of sight while simultaneously accounting for the different lengths of the ARGB headers from the following components:
- Cooler Master MasterFan SF240P fan (mounted to the radiator of the next component in this list)
- EK 240mm D-RGB AIO cooler
- Cooler Master MasterFan SF360R case fan (mounted to the front of the 4000D Airflow)
- Cooler Master SickleFlow 120 ARGB exhaust fan
The adhesive strips included in the package are thin by design. The rubber backside of the controller requires proper installation of the strips. Applying the incorrect sides to the controller and the case will result in the adhesive rubbing off after one or two removals. Opting for traditional 3M double-sided adhesive tape will not provide a firm mount due to the lack of bonding with the rubber.
Cabling for power required connecting another cable into the modular power supply. No issues were encountered with poor pin alignment within the power cable. The USB cable header has sufficient length to support the backside mounting without inducing excessive stress on the Micro USB end of the cable. While the interfaces for power and data were non-eventful in nature, the ARGB connections demonstrate that this is a first-generation product with room for improvement.
The [2-pin, space, 1-pin] layout per header is visible by peeking into the side of the controller. Razer did not account for the inconsistent sizing for ARGB connectors from different manufacturers. EK’s ARGB connections are wider and slightly taller than what may be found on a case connection or on a fan from a myriad of manufacturers. Insertion into the slot is a gamble; brute-force is required to properly seat the connector and a slightly erroneous entry will result in bent or misaligned internal pins that cannot be easily straightened out.
Operational Experience
After all physical connections have been made and the system is powered on, the Synapse software automatically detects the Razer Chroma Addressable RGB controller. Selecting this item from the list of peripherals shows the channels that it detects as connected. Manually setting a channel to enabled cannot be done through the UI. This was exceptionally problematic for the connection between the ARGB header on a Sapphire Nitro RX 6700 XT and the controller. Two additional shutdown and reconnect efforts had to be completed without a successful outcome. During the POST and boot process, the lighting on the GPU matched everything else that was connected to the controller. Once Windows loaded, the lights would stop working and numerous rescans did nothing to correct the problem.
The workaround, at least in our experience, involved re-introducing the 1-to-3 ARGB splitter with a direct connection to the controller. This allowed relocation of the EK ARGB connection to interface with the controller as well as providing a partial resolution to the GPU lighting synchronization. After three scans, the channel connected to the GPU and pump block appeared in the software. Rescans were hit or miss on retaining the settings. Opting to manual refreshes after successful activation of four channels prevented the potential loss of lighting for the associated elements.
The auto-detection of number of LEDs per channel was also inaccurate. The MasterFan SF240P is a unique beast with 56 LEDs. The detection routines never reached this total. Manually adjusting the count within the software was possible. Setting a fixed value of 56 isn’t a singular event. The software does not wait for completion of numeric entry before adjusting. Each keystroke in the field results in the lights flickering and subsequent rescan of the noted channel. The software also doesn’t account for the MasterFan use case. Options consist of LED Strip and Fan. Selecting Fan for the channel will cap the number of LEDs at 40. Selecting LED Strip for the channel allows manual entry the total number of LEDs as well as setting the counts for more complex layouts which may have bends.